Create and manage workspaces
MeetRecord enables you to set up new workspaces to better organize your teams and data. Follow these steps to create and manage a new workspace, assign users, and configure settings tailored to your needs.
Step 1: Create a New Workspace
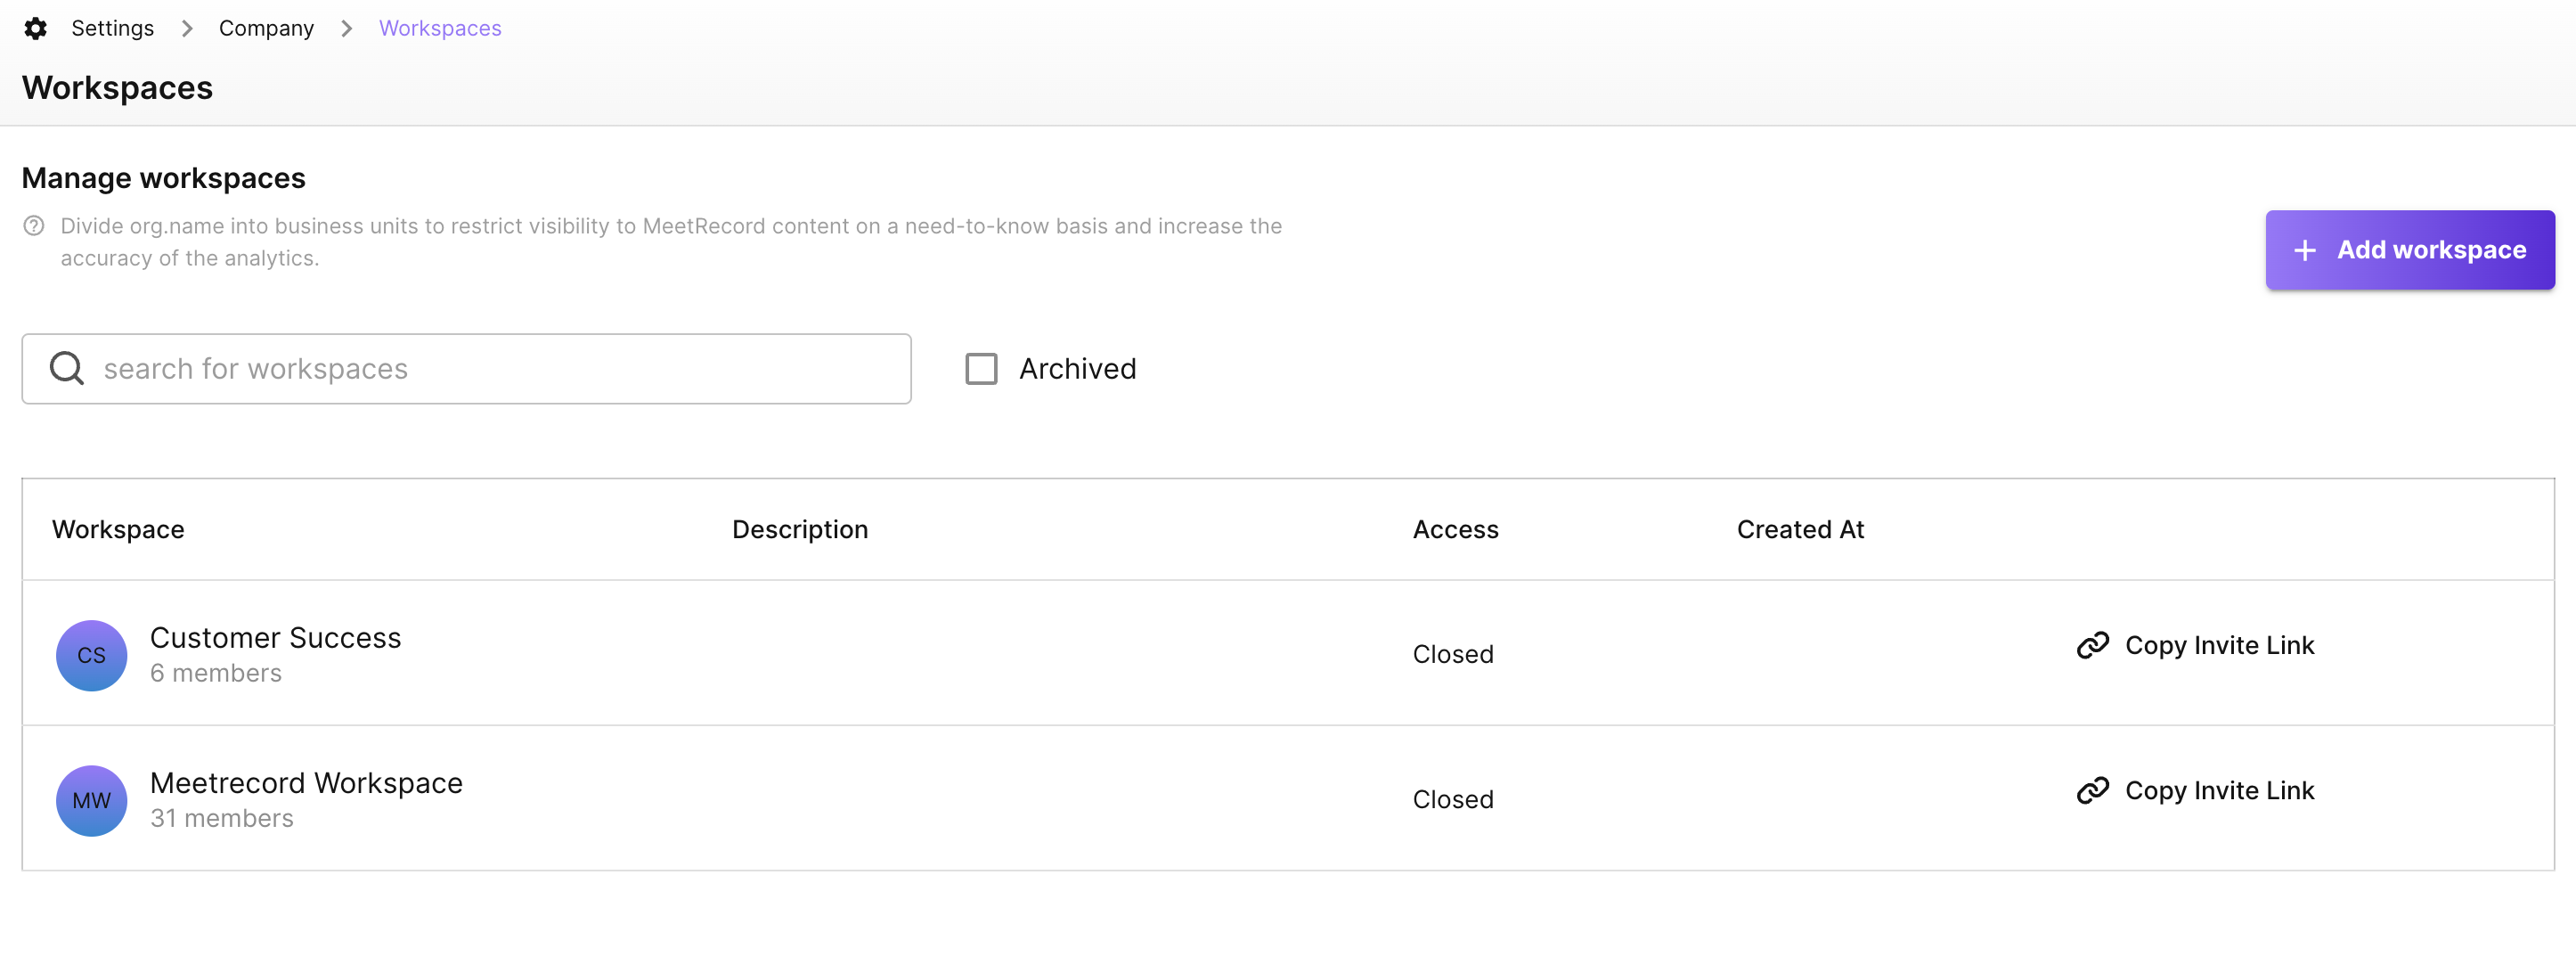
- Navigate to the Company Settings > Manage Workspaces page and click ADD WORKSPACE.
- Enter a Name and Description for the workspace.
- Click SAVE to create the workspace.

Step 2: Assign Users to the Workspace
Automatic Provisioning for New Users
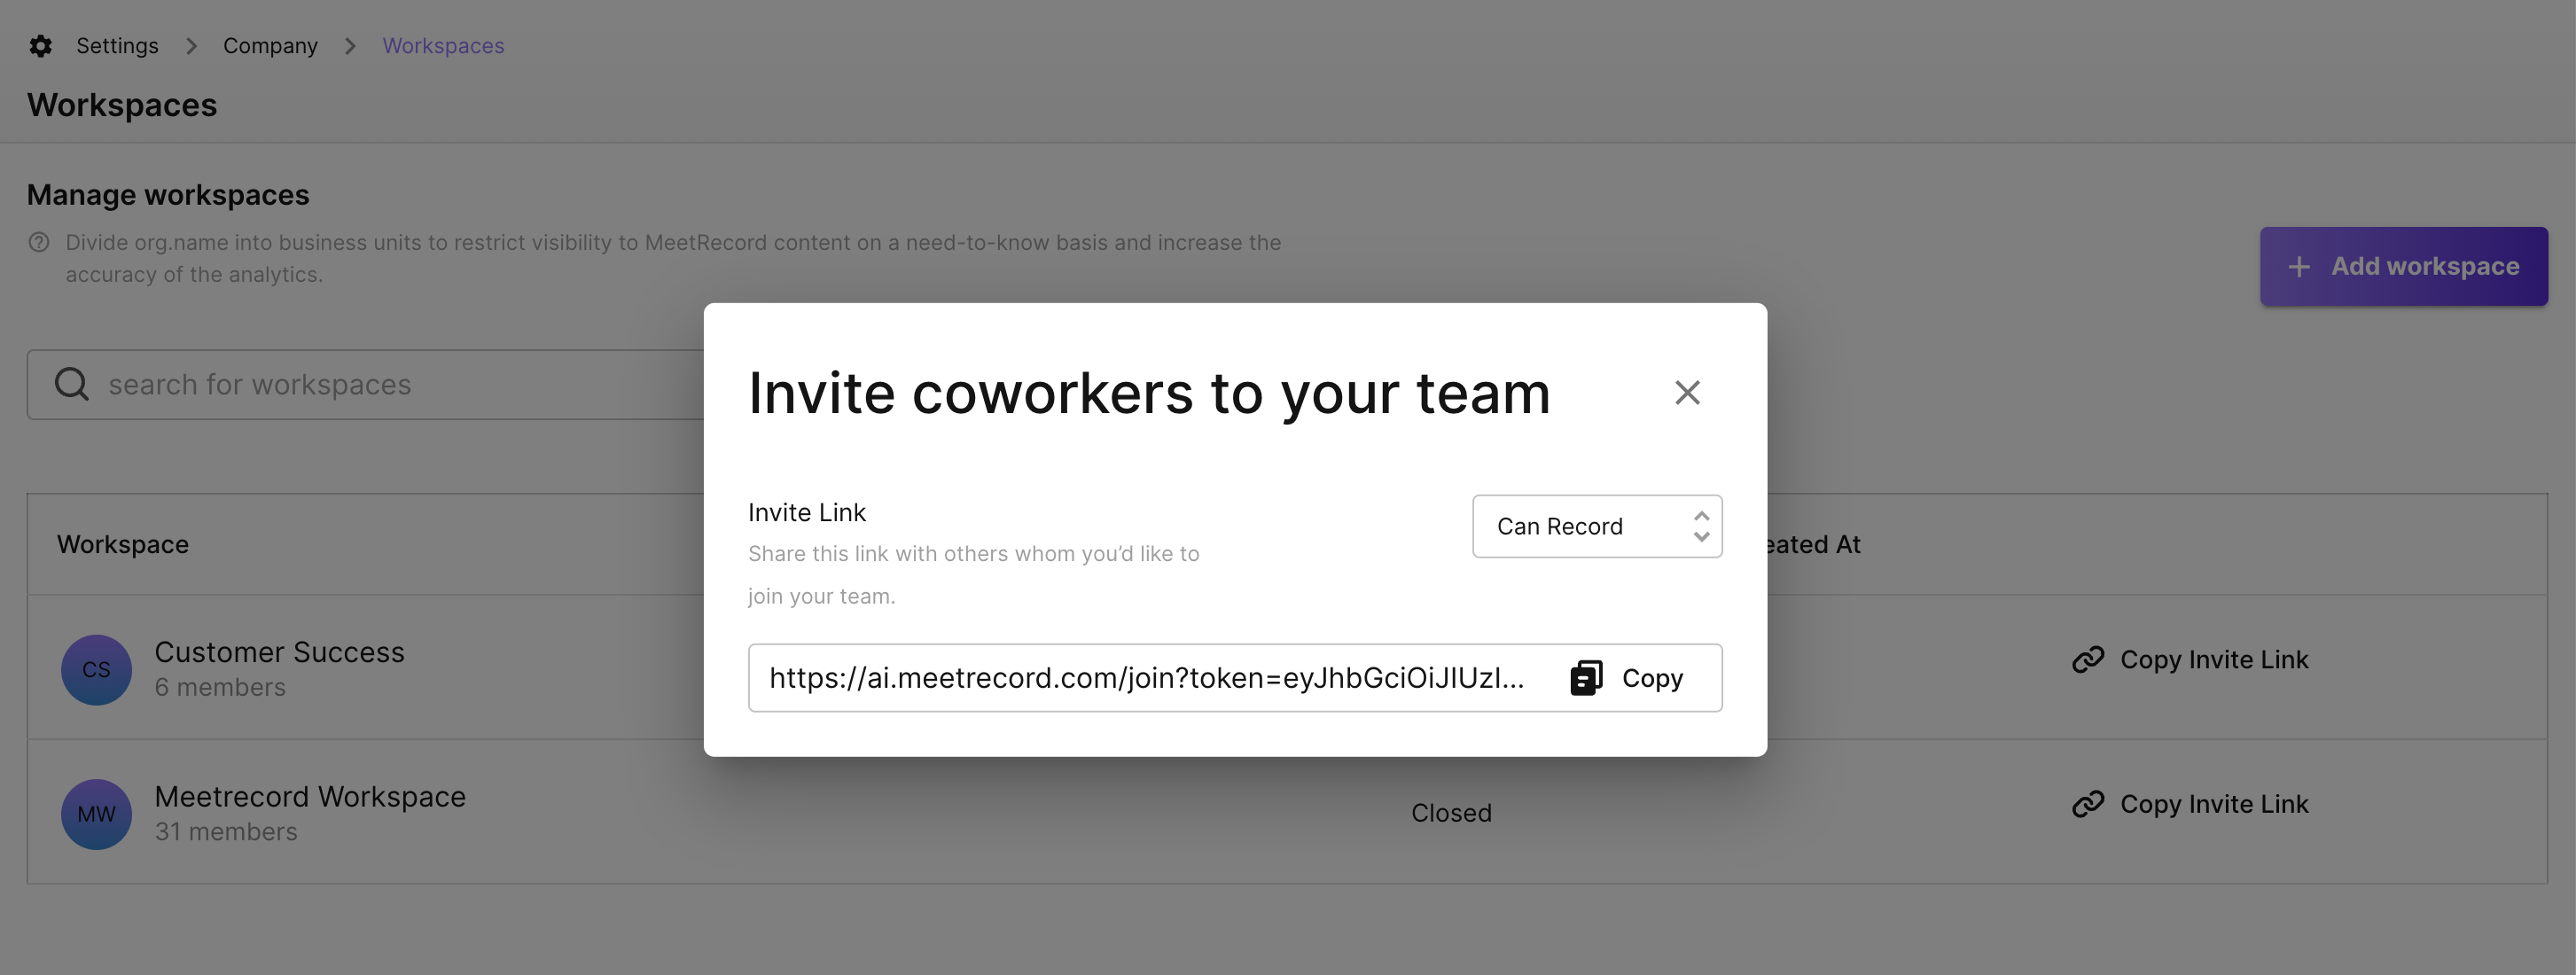
- Go to the Workspace Settings page and click Copy Invite Link
- Select whether they can record calls or only view data, and share it over email with the members.

Manual Provisioning for Existing Users
- In the Company Settings page, click Team Members.
- Update data capture and permission settings for the users you want to assign to the new workspace.
Step 3: Configure the New Workspace
Set up or update business-specific settings within the workspace to align with your team's requirements:
- User Roles: Define user roles and access levels.
- Trackers: Create trackers for monitoring key terms or phrases.
- Call Categories: Organize calls based on stages or business needs.
- Scorecards: Establish evaluation templates for structured feedback.
- Custom Vocabulary: Add unique terminologies relevant to the workspace.
Note: For creating new topics or adjusting the data retention period, contact your Customer Success Manager (CSM) or MeetRecord Support.
Benefits of a Well-Configured Workspace
- Improved Organization: Tailor workspaces for specific teams or use cases.
- Enhanced Collaboration: Assign users with appropriate permissions and access.
- Custom Insights: Set trackers, scorecards, and other tools to align with workspace goals.
- Data Compliance: Adjust retention periods to meet regional or organizational policies.
By setting up workspaces effectively, you can streamline workflows, improve data visibility, and enhance overall team efficiency in MeetRecord.
